WARNING
This blog may contain technical information
which may cause swelling of the brain-box.
After my last blog about some of the work the I had been performing in the hanger I had a few comments about how technical and brain numbing (but amazing) it all was. So I'd thought I'd get in there first to let you know that this was going to be a bit more on the "em yeah well okay ... if you say so" side of the work here.
Since May 2010 there has been various people working on a twin engined Cessna 402B from Wings With "The Word" mission up in Maine. Cessna produced an inspection that all 402's have to go through. The inspection is on the wings forward spars. All the bolts holes have to be inspected for cracks (using Electromagnetic tests). If we had found cracks, it could well have been the end of the aircraft because of the cost to open up the wings and replace the wing spar or get a replacement wing. Thankfully for the mission, the wings passed with flying colours, which meant that we had to perform the second part of the modification.


If your aircraft passed the test, an external spar cap (a very long thick piece of aluminium) had to attached to the outside underneath using some very special fasteners. But before any of the work could start, the drawings supplied by Cessna had to be interpreted, and this is where all my previous knowledge came to the forefront. After working in a design office for more than ten years, I was able to help decipher their drawings, parts lists and modification documents.

Helping to decipher the drawings.
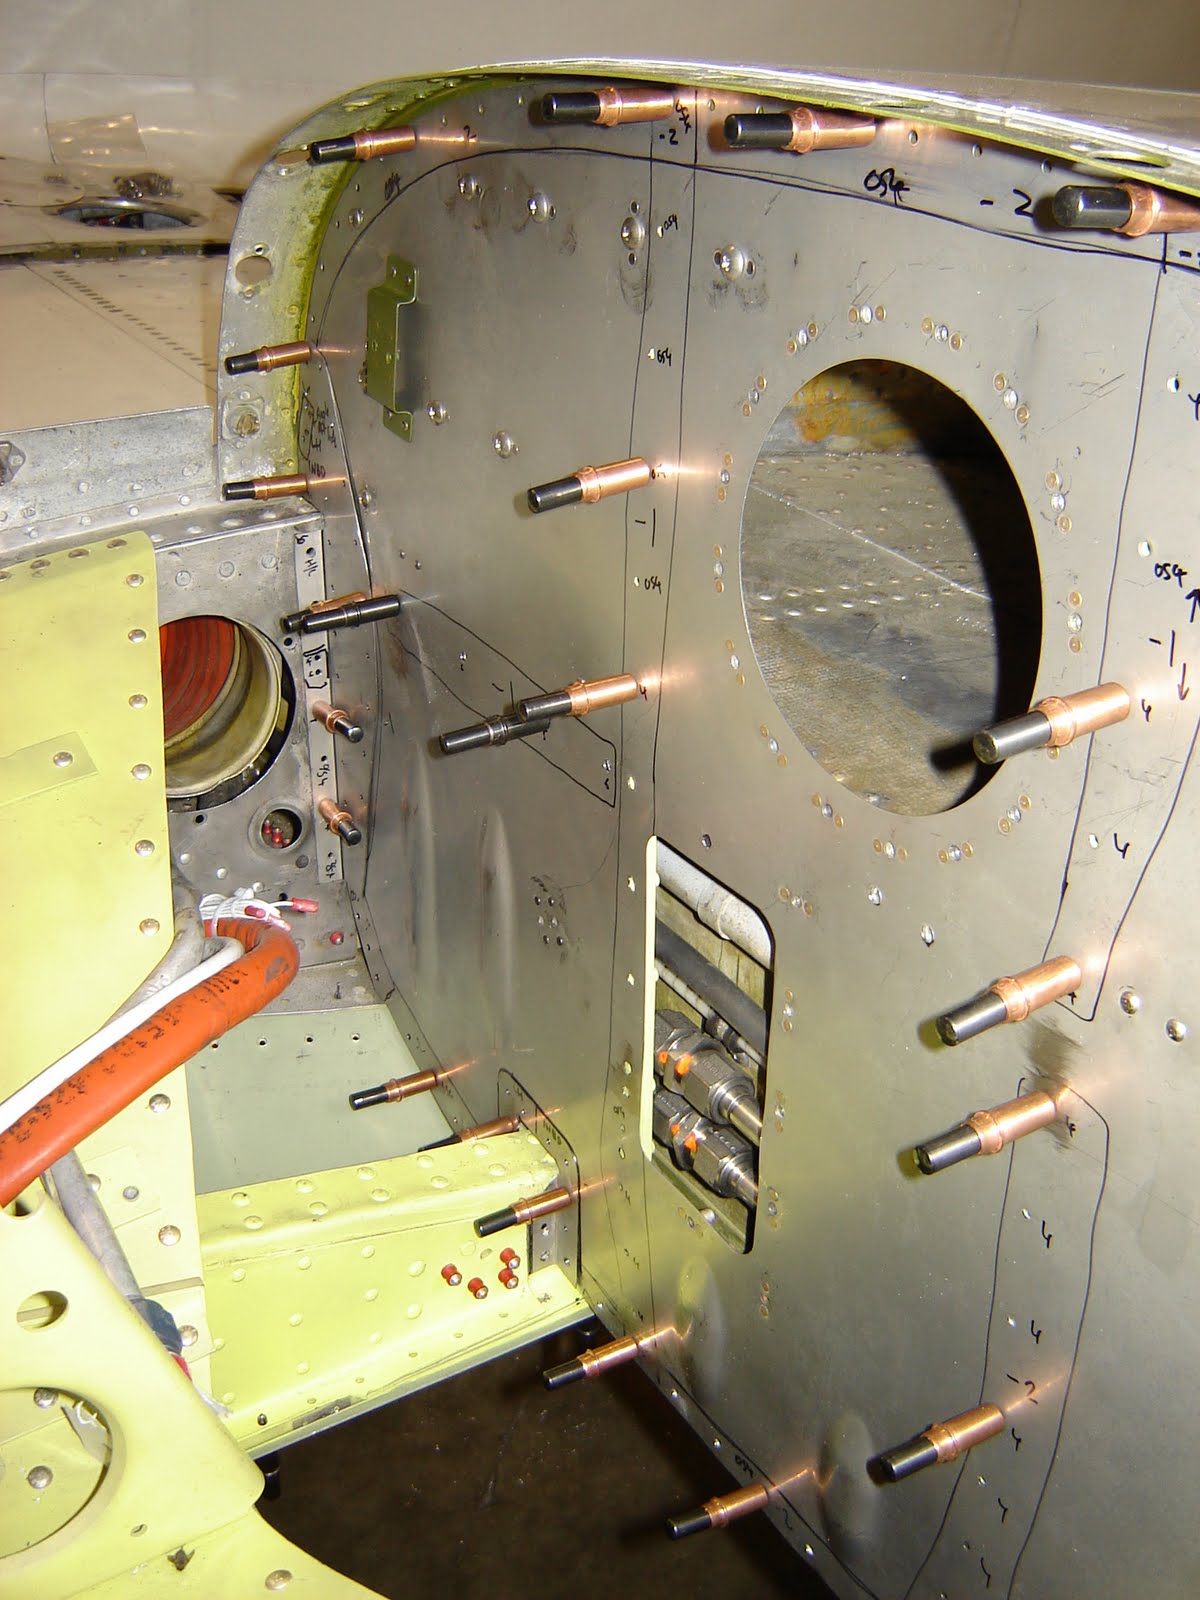
Now we could start. We had to clean out the whole area, remove hundreds of fasteners, strip paint, and then drill about 300 holes (each side) into the new spar cap so that it could be installed. This also meant removing the firewall (large sheet of stainless steel that sits behind an engine that should stop a fire from getting through to the structure so that you can land and not crash), and numerous skins so that we could get to the holes.


Spar Cap being drilled in place!
Because of the special fasteners that have to be installed, every hole in the spar cap had to be drilled about 3 times and them reamed (this ensures that the hole is to a specific diameter so that there is an interference fit between the fastener and the structure). So drilling hundreds of very accurate holes took a very long time. But they were finally all installed.


Fasteners going in. Spar Cap Completed.
Now that we have completed the installation of the Spar Cap, we need to reinstall all the parts that we took off. But it also hasn't been that easy, as when we removed parts we kept on finding corrosion, cracks or just bad holes in many parts. This meant that we had to manufacture new parts from sheet aluminium, stainless steel etc which reduced costs for the mission. Some parts we just couldn't manufacture, so had to research the web for the parts at the cheapest cost.


New Skins and panels fabricated.
As well as new structure to be fabricated, we found a lot of damage on the wiring looms that entered the engine compartment. So they had to be pulled out of the wing, removed, new ones fabricated and routed back into the wing again.


Wires hanging from the wing. Major Damage due to arching.
The other part to be done was the replacement of the firewall. All of the brackets had to fabricated from stainless steel and all the fasteners had to be monel (a type of metal) as they are corrosion resistant and have a very high melting point.


Firewall going in. Firewall installed.
At the moment the spar caps and firewalls are installed and complete. The left wing has had much more work done on it (a whole new canted bulkhead had to be installed, the green/yellow structure in the photo above) but most of the forward skins have been installed. We still have to work on the aft skins, as well as additional modifications from Cessna that are in that area; including a new auxiliary wing spar, stainless steel fuel lines behind the firewalls and new access doors in the forward skins to better inspect the exhaust system.
Then it's reinstalling the main undercarriage, installing the engines and putting everything back where is came from. I will finish this blog about the 402 once the work has finally been complete. Just to prove that I have been working hard, below are a few photos of me working on various parts of the job.


If you follow the link below, this will take you to MMS Aviation's blog that shows a short video of me removing the firewalls. It is the first of seven movie clips that have been taken of this project.
http://mmsaviation.blogspot.com/2010/05/cessna-402-spar-cap-project.html
Nice blog post. And nice legs too!!!! Shorts, wow must be warm where you are?
ReplyDelete