I've been back in the hangar now for a while after our trip to Florida and have been working on a 1961 Cessna 185 that belongs to Amazon Salt & Light (ASL). This aircraft suffered damage after performing a ground loop and the repairs to it were started by New Tribes Mission but due to lack of time and man-power, the aircraft was shipped to us to complete the work. This included a new roof, a replacement window and a new cowling for the upgraded engine. During the accident, both wings were so badly damaged, the financial costs deemed them unrepairable. Therefore, ASL managed to get a pair of used wings from Skywagon City. These wings came with some slight damage and they had nothing inside. So we had to do a little work repairing them and then transfer everything from the damaged wings.

The leading edge of the right wing was repaired by other some of the other guys whilst I was in Florida. When I returned I was given the task of finishing off the rest of the repair work and then had to install everything back into the the wing. This aircraft had additional kits installed, as well as all the usual equipment. Here is a snapshot of the jobs I have been responsible for ...
Flap & Aileron Bellcranks, Pulleys and Control Cables:
After inspecting all the parts, I found corrosion on one of the needle bearings and a bushing on the bellcranks, so these parts were replaced. The bellcranks also had some corrosion which was removed and then the bellcranks were primed to prevent it corroding further. The bellcranks and pulleys were re-greased before being installed and the control cables routed through the wing ready for rigging.
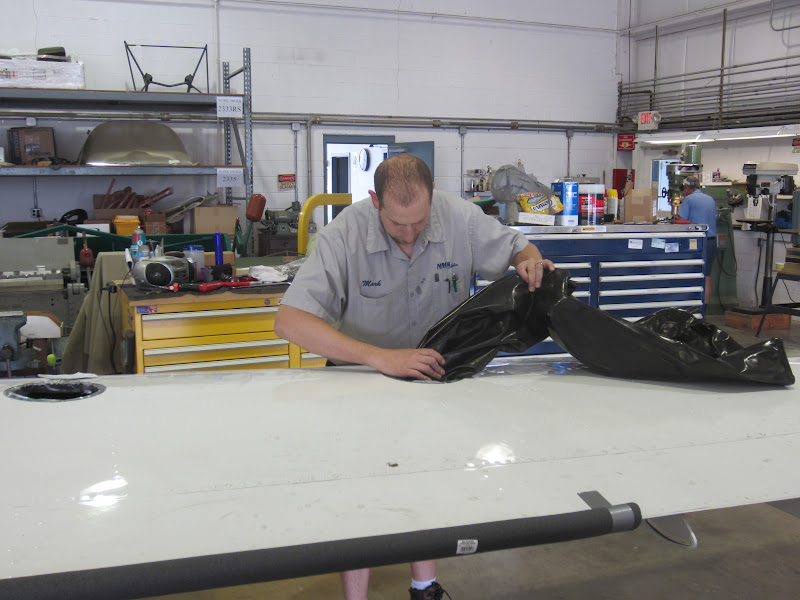
Fuel Tank, Fuel Cell, Fuel Quantity Sender and Fuel Vent Valve:
The Cessna 185 has what is called a 'Dry Wing', which means that it has a bladder instead of pouring the fuel directly into a sealed wing section. When you use a fuel cell, all the rivet heads and edges in the fuel tank have to be taped over with a special tape. The replacement wing had some very old tape, so all this had to be removed, the tank cleaned out and new tape applied. As I was about to install the fuel cell into the wing, I noticed a crack around one of the vent nipples. Therefore, we had to send it away to be repaired by Eagle Fuel Cells. But upon further inspection, they found that the seams were also leaking and beyond repair. So, we had to purchase a new cell. I also found the fuel vent valve, that needs a by-pass vent hole drilled into the side, had the hole drilled way too large. We had to replace it and then drill the correct size hole. Lastly, when removing the fuel screens, we found one screen was missing and was later found inside the fuel cell, whilst the other had a cracked sleeve. One was repaired and the other was replaced.


STOL stands for Short Take-Off and Landing. A STOL kit is designed the improve the stall characteristics of an airplanes wing so that it can fly slower safely and therefore land and take-off at a slower speed. There are numerous kits available for general aircraft including the Horton STOL, Robertson STOL, Sportsman STOL and the Crosswinds STOL. The Horton STOL Kit consists of two leading edge cuffs, a stall fence, aileron gap seals and a new wing tip for each wing. One of the cuffs was damaged, along with the wingtip and aileron gap seals, and two form blocks had been installed incorrectly so these all had to be replaced. The rest was removed from the damaged wing. This was the first time I had installed a STOL Kit, but by following the drawings I managed to do a fair job of riveting the cuffs on, placing the fence in the correct position, fabricating new aileron gap seals and install the wingtip.


A.R.T. Wing-X Wing Extension:
Air Research Technologies Inc have developed a wing extension kit which will increase the gross takeoff weight of the aircraft which means that you can carry that extra load or additional passenger. This is very useful for when you are out on the mission field and don't know when you have to carry that extra load. Because of the extra stress on the wing by adding the extension, the kit also includes a packer and doubler to strengthen the top of the main spar and a stainless steel strap for the bottom of the spar. The top ones were done during the leading edge repair, but I installed the lower strap. The wing extension for the right wing had some damage, so I had to repair the extension before it could be installed. Once the repair was completed, it was time to add on the extension, making sure the dihedral, leading edge and trailing edge all line up.


The aircraft wing is now about 2 foot longer with the extension but it also has a new leading edge profile from the Horton kit. Therefore, the wing extension also needs a new profile to match that on the wing and the wing-tip. That is where the Bushton Cuff comes in. A.R.T. have developed that cuff to match the profile of most STOL kits. It sits under the STOL cuff and the the wing-tip and it forms the profile. Then the bushton cuff is riveted onto the wing extension.

Well, that is what I've been doing to get the wing ready for intallation to the fuselage. Once it's done, I will be going over to the left wing to help the guys there, using all the knowledge that I've gained by installing all these kits and repairs.
 |
| The Completed Wing (Just needs painting) |
Great story about the fuel cell repair/replacement. About How long did it take you to remove the old cell, clean the tape, retape and install the new cell? (I have a '61 Cessna 210 that needs the left fuel cell repaired/replaced
ReplyDeleteTimothy, this was the first time I had done a 'dry wing', but I would say for this 185 with extended tanks, about a day a half to remove the cell and clean the tank. Then another day and a half to completely tape it up. But because the new tank was so felxable and easy to manoeuvre, it just took a few hours to put it back in.
DeleteYour job may not take as long, depending how bad the tape is and how big the tank is. Also fabricated threaded studs from some old bolts to help with installing the fuel quantity indicator and the top plates to the cell.
We go the cells from Eagle Fuel Cell because we aslo bought their STC for the fuel cell drain. Stainless steel drain that can be cleaned and change the o-rings whilst still in place compared to the Cessna Aluminum drain. But both Eagle and Hartwig came to about the same with an installation kit.
Hope all this helps.
Mark